End-to-end encryption using OpenPGP is one method users can utilize for Emails with Mailfence.
However, OpenPGP encryption isn’t always straightforward, and proper key management remains a challenge. In this guide, we will share important tips for securely managing your OpenPGP keys, including:
- how to generate and manage your OpenPGP keys;
- how to exchange OpenPGP keys with others;
- how to set expiration dates on your private keys;
… and much more! So let’s dive in.
Note: if you need a refresher on what OpenPGP is, check out this blog post here.
Sign up to the Mailfence Newsletter!
Stay up-to-date with the latest news in the world of online privacy and cybersecurity
Tip #1: Generate the Strongest Key Possible
Mailfence by default generates a 4096-bit key using RSA (Rivest-Shamir-Adleman), one of the oldest and most widely used public-key cryptosystems.
Mailfence also supports key generation using Elliptic Curve Cryptography (ECC) with Curve25519 (256-bit key length).
ECC algorithms are generally faster and more efficient than RSA, especially in environments with limited computational resources. If you plan to generate your private key using an external tool, make sure it is based on either ECC with Curve25519 OR RSA with a 4096-bit key length.
Tip #2: Verify Public Keys
Anyone can upload keys to public key servers.
This means there is no reason that you should trust the given relationships, i.e. the association between the email ID and the public key.
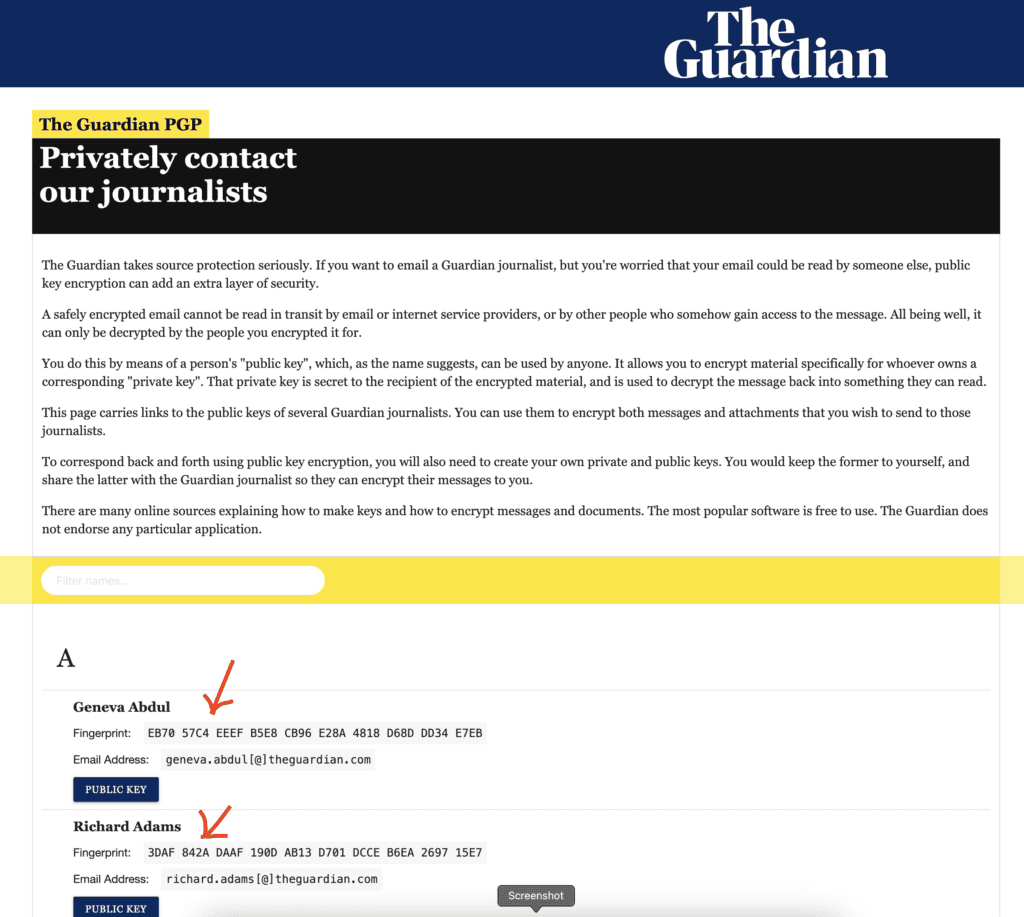
You should therefore verify with the owner the full key fingerprint of their key. It is recommended that you do this verification in real life or using a different channel than the one used for exchanging or downloading the contact’s OpenPGP public key.
As a reminder, the fingerprint is a hash of the key material (part of the user’s certificate) and appears as one of the certificate’s properties.
If this is not possible, then look on places like social media, personal websites, blogs,… which belong to the individual you want to have a key fingerprint of – as some people simply publish their public key fingerprint.

Make sure to verify this fingerprint before importing it.
Tip #3: Don’t Just Rely on the KEY ID
Always verify an OpenPGP public key by its full fingerprint rather than relying on short or long Key IDs.
Many RSA/DSA-based keys use a 160-bit fingerprint (displayed as 40 hex characters), whereas ECC keys may have a 256-bit fingerprint (shown as 64 hex characters). Checking only a 64-bit (long) Key ID (e.g., 0x44434547b7286901) is risky – an attacker can deliberately forge collisions in that smaller space.
Tip #4: Update Public Keys in your Keystore
If you don’t update the public keys in your key store, then you do not get timely expirations or revocations.
Both expirations and revocations are very important to be aware of.
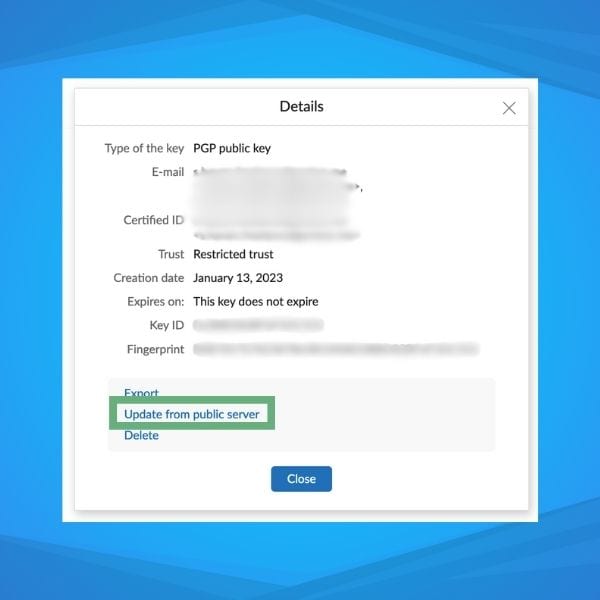
With Mailfence, you can do this by simply clicking on “Update from public server” on any imported public key that you have in your keystore.

Tip #5: Generate a Revocation Certificate
If you forget your passphrase or your private key is compromised or lost, you cannot easily revoke your key unless you (1) still have passphrase access or (2) already have a revocation certificate.
Immediately after generating your OpenPGP key pair, create a revocation certificate and store it in a safe place (offline storage, password manager, etc.).
If you suspect compromise (or have definitively lost control of your key), publish your pre-generated revocation certificate to the public key servers. This action flags your key as “revoked” so others know not to trust it going forward.
Note that a revoked key can still be used to verify old digital signatures or, if the private key is accessible, to decrypt old data.
Note: Keep in mind that your revocation certificate is ready to use. If someone else gains access to it, they can use it to revoke your key.
Tip #6: Set Expiration Dates
Another tip that is often overlooked is to set an expiration date on your keys.
Setting a time limit ensures that if you ever lose your private key – or forget to revoke it – it will eventually become invalid on its own, reducing the risk of unauthorized use.
Think of the expiration date as a “safety valve”. If you lose control of your key and cannot revoke it, it will eventually expire; if you still have full control, you can update it before the deadline.
A useful practice is to set a calendar event to remind you about your expiration date.
Also, create and safely store a revocation certificate right after key generation. That way, if a compromise happens, you can revoke the key without relying on an eventual expiration.
Tip #7: Securely discover and exchange OpenPGP public Keys
The first time you encrypt your emails with OpenPGP, you might be confused. How do I get my recipient’s public key? How does he get mine? Here are some of the most common methods you can use.
Method 1: Direct distribution using digitally-signed emails
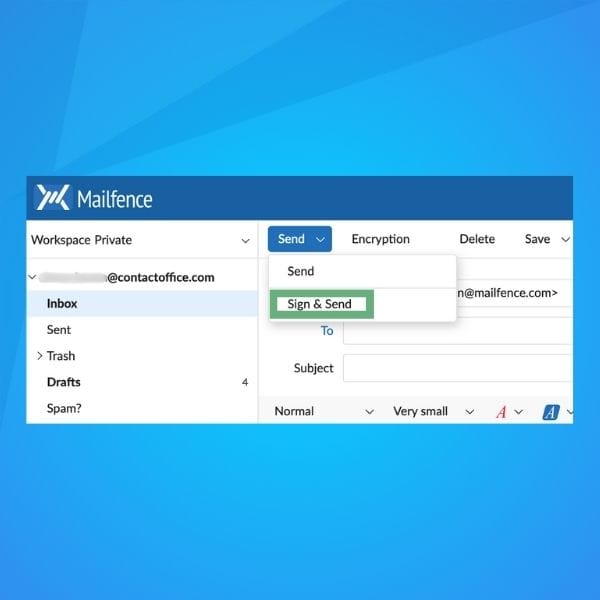
The first option is to send a digitally signed email with your public key attached to your recipient. Subsequently, your recipient should do the same. This will require you to have the email address of your recipient in advance.

Method 2: Use a secure protocol
Many modern email providers and PGP setups support Web Key Directory (WKD), which lets others automatically fetch your key from your domain in a more privacy-friendly manner.
In case WKD support is not available, a Validating Key Servers (VKS) can be used (e.g., keys.openpgp.org or keys.mailvelope.com). They require email verification before publishing a user ID, mitigating some spam and impersonation risks. There are also Older Key Servers (SKS-based): While you can still upload your key to traditional SKS key servers, be aware they can be spammed or poisoned.
Mailfence supports both WKD and VKS.
Method 3: Multiple trusted channels
Whenever possible, make your public key widely and reliably discoverable. You can sometimes find the OpenPGP public key on a user’s website/or other online presence. Mailfence also provides the option of sharing documents via public links which can be used to share an OpenPGP public key. An instant chatting app can also be used, in most cases, this option will require you to have the mobile number of your recipient in advance or you also need to both be using the corresponding app.
Method 4: Meeting in person
If you know your recipient in advance and it is possible to meet in person, then this is probably the most suitable option. You can share or exchange the public key using a flash drive. Then exchange its fingerprint orally, or by any other possible means that is secure and reliable.
The goal
When exchanging OpenPGP public keys, your top priority is confirming that the key truly belongs to the person claiming it. Merely finding a matching name or email on a key server or website does not guarantee authenticity – out-of-band fingerprint verification is essential.
Publish key fingerprint in Multiple Trusted Channels
- Post it on an official website, in personal or corporate documentation, and on verified social media.
- If you use a professional network, consider adding a note or link containing your key fingerprint there as well.
Verify fingerprints Out-of-Band
- Encourage your contacts to confirm fingerprints through a trusted channel (e.g., phone call, in-person, video chat).
- Even if someone sends you their public key within an encrypted message, verify the fingerprint separately to thwart impersonation attacks.
Tip #8: Back up your Secret Key Material
Double-check that you have an encrypted backup of your secret key material.
Ideally, you should backup your key (encrypted with your passphrase by default).
With Mailfence, you can easily back up your secret keys and any other sensitive document with our virtual cloud solution.
Also, make a backup of your revocation certificate and store it in a protected location on your device.
Tip #9: Make Proper Use of the User ID
Do not include a “Comment” in your User ID, if you don’t need to. An OpenPGP User ID is typically used to specify your name or alias and is not intended for adding comments.
Tip #10: Avoid replying to an Encrypted email in Plain text
When replying to an encrypted email, delete the decrypted content and quote only the relevant parts if necessary. Configure your application to avoid saving drafts in plain text (or store them encrypted by default).
Tip #11: Protect your Meta-Data
Note that, while your email body might be protected by end-to-end encryption, the subject line and message headers are generally not encrypted. Minimizing the contextual information leakage from the communication is also a good practice by simply hiding/avoiding the meta-data (to, from, subject, ip address, etc).
Where possible, and relevant, take control over that information and unlink it from data linked to you.
For example, you can control the From field by creating a new email account. The IP address of the sending email client can be changed by using a VPN, Tor, or a different Internet connection.
Choose generic subject lines like “Follow-up”, “Next Steps”, or “Discussion Summary”, rather than revealing specifics like “Meeting Notes from Our Visit to the Eiffel Tower”. Move all sensitive or identifying information into the encrypted body of your message.
Tip #12: Final Checks
Finally, here are some last checks you can perform on your OpenPGP keys:
- ensure your OpenPGP key format is not v3 or older;
- verify that your OpenPGP keys should have a reasonable expiration date (for instance, 2 years in the future).
If you have generated your private key using Mailfence, you can be assured that the keypair will be generated with strong technical parameters.
Last Word on OpenPGP Best Practices
This wraps up our guide on OpenPGP important practices! We hope you found it useful and will be able to put these tips into practice.
If you are interested in diving deeper, you can check out the following readings:
- What is OpenPGP?
- End-to-End Encryption. What Is It and How Does It Work?
- Symmetric vs Asymmetric Encryption: What’s the difference?
- Digitally Signed Emails. What Is It And How Do Digital Signatures Work?
OpenPGP: Frequently Asked Questions (FAQs)
OpenPGP is an encryption protocol that ensures secure email communication through end-to-end encryption. It helps verify the sender’s identity and protects message confidentiality, ensuring that only the intended recipient can read it.
You can share your public key through digitally signed emails, encrypted messaging apps like Signal, social media profiles, trusted public key servers, or in-person exchanges. Always verify the fingerprint before trusting a key.
A revocation certificate allows you to mark your OpenPGP key as invalid if it is lost, compromised, or no longer in use. Without one, others may continue trusting the key even if it’s compromised.
Setting an expiration date acts as a safety measure. If you lose access to your private key or it gets compromised, the key will automatically expire. You can always extend the expiration date later if needed.
Always back up your private key securely, use strong passphrases, and store backups in secure locations.


