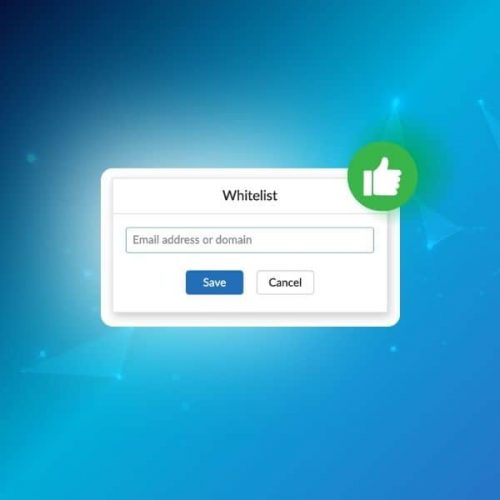
Choosing to whitelist an email address is the best way to make sure you don’t miss vital emails again.
Have you ever searched for an important email in your inbox? Only to realize weeks later that it was actually in your spam folder?
That’s why whitelisting was created. In this guide, we’ll cover everything you need to know to whitelist an email address in the most popular email providers. Let’s get started.
What Does Whitelisting Email Addresses Mean?
Whitelisting an email address is the process of marking it as a trusted sender in your email account.
Whitelisting basically tells your email service to always deliver messages from that sender to your inbox rather than the spam folder.
In most email providers, you can choose to whitelist a specific address or an entire domain name. Using an email verifier can enhance this process by ensuring that the addresses you whitelist are valid and active, reducing the chances of important messages being misclassified as spam.
For example, let’s say you subscribed to the New York Times. But it has mistakenly fallen into your spam folder:
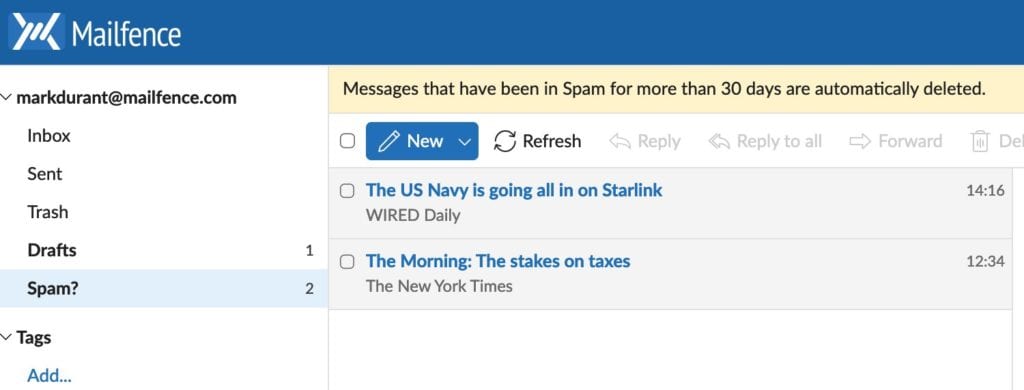
You could choose to whitelist the email address of the New York Times (in this case, “nytdirect@nytimes.com”). But if you’re subscribed to multiple newsletters from the New York Times, you might want to whitelist all email addresses coming from “…@nytimes.com”.
By the way, if you want your own custom domain just like the NYT, check out this guide.
Choosing to whitelist an email address is particularly helpful for keeping important emails from being overlooked or lost. Let’s explore how to do this with the most popular email services.
How to Whitelist an Email in Gmail
As one of the most popular email providers, let’s first look at Gmail. Please note we do not recommend you use any of Google’s products by the way 😉.
Gmail’s spam filter works well, but sometimes it can mistakenly sort important emails into the spam folder. To avoid this, you can manually whitelist an email address.
To whitelist an email address in Gmail:
1. Sign in to your Gmail account;
2. click the gear icon in the top right corner, then select “See all settings;”
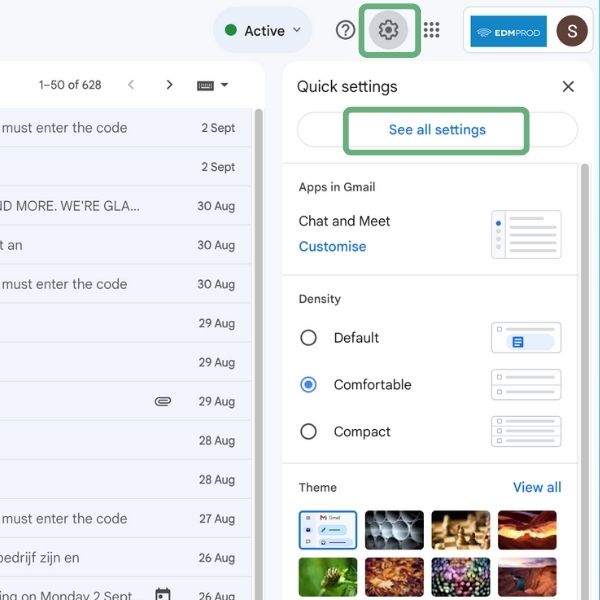
3. Navigate to the “Filters and Blocked Addresses” tab.
4. Scroll down and click on “Create a new filter.”
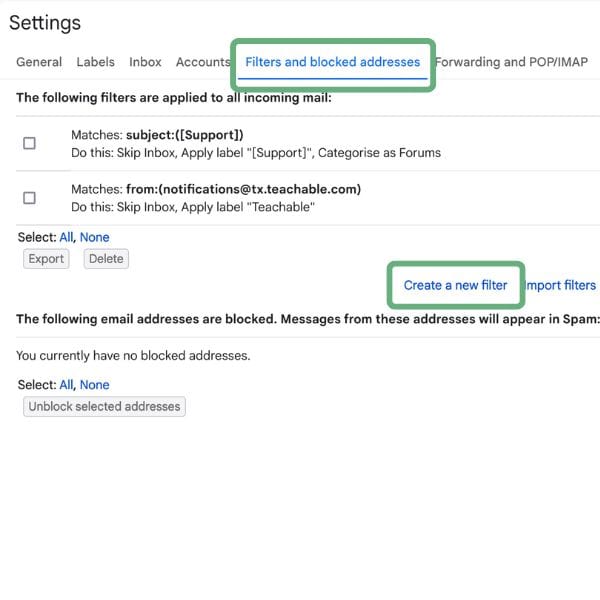
5. Enter the email address or the domain you want to whitelist in the “From” field;
6. Click “Create filter” at the bottom right.
7. Check the box for “Never send it to Spam” and click “Create filter” again to save.
If you’re looking for the best Gsuite alternative, check out this guide here.
How to Whitelist an Email in Outlook
Outlook provides a simple method to whitelist email addresses, helping to keep important communications from being mistakenly filtered:
1. Sign in to your Outlook account
2. Click on the gear icon in the top right corner to access your settings.
3. Under the “Email” section, click on “Junk email.”
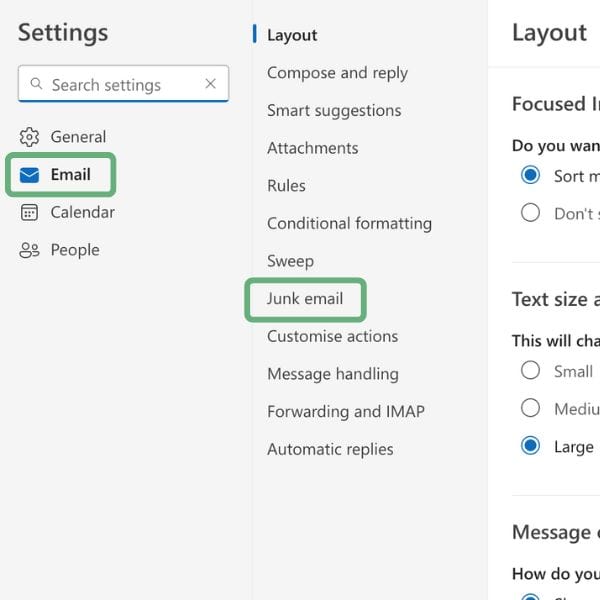
4. Under Senders > Safe senders and domains, click on “+ Add safe sender”:
5. Enter the email address or domain you want to whitelist, then click OK.
6. Make sure to hit “Save” to apply the changes.
Now, emails from these addresses will bypass your junk mail filter and arrive directly in your inbox!
How to Whitelist an Email in Yahoo! Mail
Yahoo! Mail’s spam filters can sometimes be too aggressive, filtering out emails you want to see. Here’s how to whitelist email addresses.
1. Login to your Yahoo! Mail account.
2. Click on the gear icon in the upper right and select “More Settings.”
3. On the left-hand menu, click “Filters”, then click “Add new filters”.
4. Enter the email address or domain in the “From” field.
5. Set the folder to “Inbox” to make sure these emails always go to your main inbox.
6. Hit “Save” to confirm your filter.
You have now successfully whitelisted an email address in Yahoo! Mail.
Looking to create an email account with no phone number required? Check out our latest guide here.
How to Whitelist an Email in Apple Mail
For Apple Mail users, to whitelist an email address involves adding the sender to your Contacts or creating a rule in Mail preferences. Apple Mail prioritizes emails from contacts, so they will never end up in your spam.
Alternatively, you can also create a rule. For this:
1. Go to “Mail” > “Preferences.”
2. Click on the “Rules” tab, then click “Add Rule.”
3. Set the condition as “From” and enter the email address you wish to whitelist.
4. Under “Perform the following actions,” choose “Move to Inbox” and click “OK.”
This will direct emails from that address to your inbox.
How to Whitelist an Email in Mailfence
As a private and secure email provider, we want to ensure that no spam ever reaches your inbox. However, no anti-spam is ever 100% perfect.
If you find an email mistakenly landing in your Spam folder, follow these 2 easy steps:
1. Right-click on the email from the send you want to whitelist and select Mark > Not a spam:
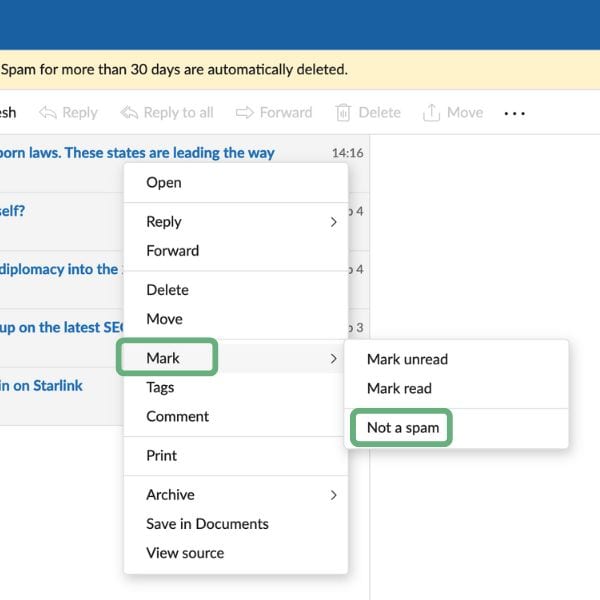
2. You will then be prompted with a window asking you if you want to whitelist the email sender or the full domain. And that’s done!
Alternatively, you can also use the following procedure to access your whitelist and review:
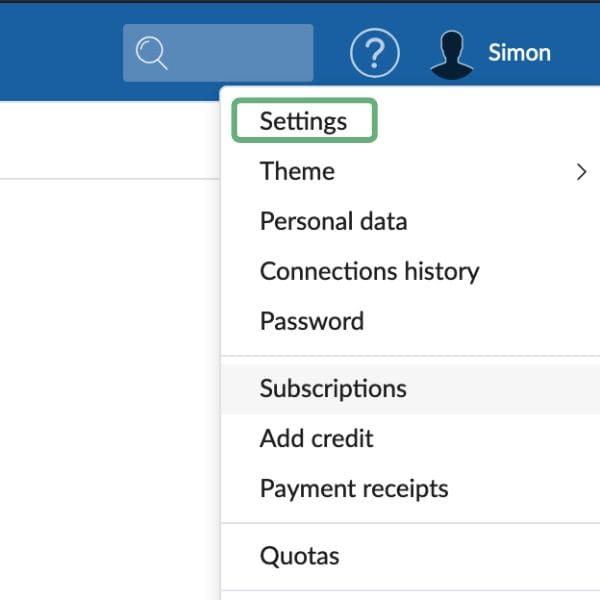
1. Log into your Mailfence account and click on your profile name > Settings.
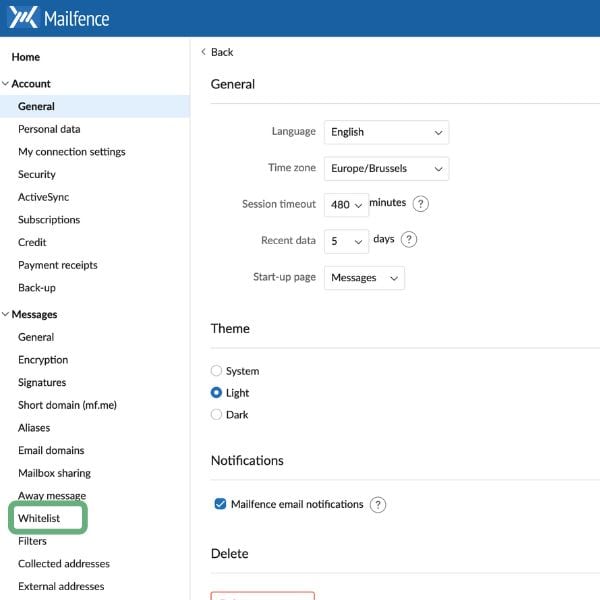
2. On the left-hand sidebar, under “Messages“, select “Whitelist”:
3. At the top, click on “Add email or domain”
4. Enter either and specific email address or a whole domain name.
5. Hit “Save” and you’re done!
This will make sure that emails from this sender always appear in your inbox.
How to Whitelist an Email in Zoho Mail
Zoho Mail’s filtering system might occasionally misclassify important emails. The quickest and easiest way to remedy this is to add the email address as a contact:
1. Sign in to your Zoho Mail account.
2. Find an email from the sender you want to whitelist and open it.
3. Click on the sender name, then select “Add to contacts”.
Now, emails from that address will always be delivered to your inbox, avoiding any spam or junk filters.
That’s it for this Guide on Whitelisting!
That’s a wrap for this guide on how to whitelist an email address! Each email provider has its own way of handling whitelists, but the general process involves creating filters or marking senders as safe.
Are you looking to step up your online privacy and security? Then create your free Mailfence account today. Not only will you get access to one of the most private and secure emails, but your free account also comes with online storage for your most important documents, a calendar, contact management, and much more!
Got any questions? Feel free to check out our Knowledge Base, or drop us a line at support@mailfence.com.
FAQs: How to Whitelist Email Addresses in Gmail, Outlook & More
Whitelisting an email address means marking it as a trusted sender so that its messages always arrive in your inbox instead of the spam folder.
Whitelisting ensures you never miss important emails. It helps prevent crucial messages from being mistakenly filtered into spam or junk folders.
Yes, you can whitelist an entire domain (e.g., “@example.com”) so that all emails from that domain are delivered to your inbox. This is especially useful for newsletters or trusted organizations.
To whitelist in Mailfence, mark the email as “Not spam,” and you’ll be prompted to whitelist the sender or domain. Alternatively, go to Settings > Messages > Whitelist to add addresses or domains manually.
