Are you looking for a way to migrate your Skiff account? You are not the only one.
On Feb 9th, Notion announced its purchase of Skiff.
Users were shocked to hear that Skiff accounts would not be transferred to Notion accounts. Furthermore, the company will shut down all Skiff products in just 6 months. So where does that leave Skiff users?
If you wish to keep your emails, contacts and more, you need an alternative to Skiff. Luckily, Mailfence offers a complete suite of encrypted and secure products including Emails, Calendars, Storage, Contacts and more. In this guide, we are going to cover how you can easily migrate your Skiff account to Mailfence in minutes.
Affected by the Skiff shutdown? Drop us an email from your Skiff address at support@mailfence.com, and we will grant you a 1-month free trial.
How to Migrate your Skiff Account to Mailfence
Firstly, make sure you have your Mailfence account set up. You can create your account for free in a few seconds here.
Next, let’s look at how to migrate your emails from Skiff to Mailfence.
How to Migrate Your Emails from Skiff to Mailfence
Firstly, select the emails you wish to export. You can select individual emails, or choose to export your entire Inbox. Export your emails either as an EML or ZIP file.
Next, right-click on any email, and select Export. Your emails will now be downloaded to your device.
Once your emails are downloaded, you are ready to import them into your Mailfence account. For a detailed guide, check out our Knowledge Base article here.
In short, all you need to do is:
- Navigate to your Inbox > More.
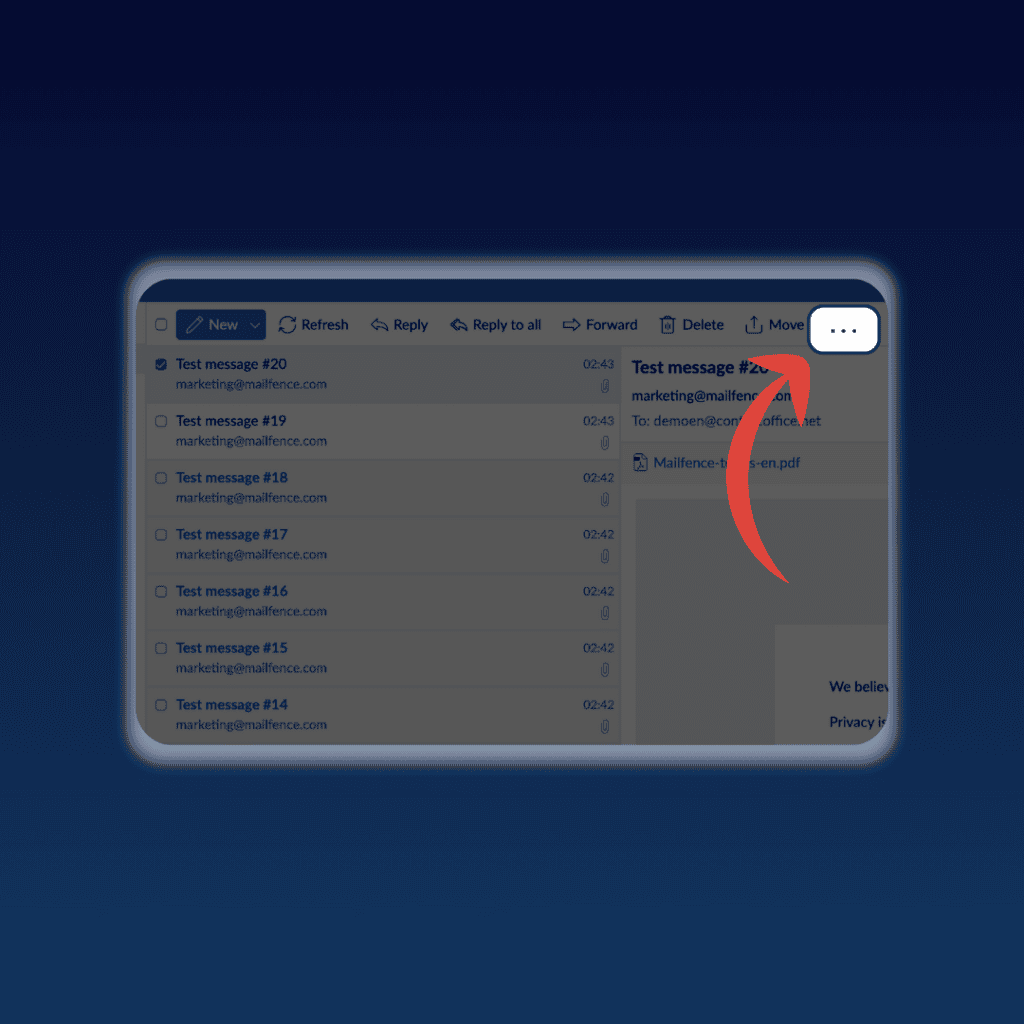
- Click on “Import” > Select your folder.
However, this solution is best suited for inboxes smaller than 50Mb. If your Skiff inbox is larger than 50Mb, we recommend using IMAP. You can find more information on this procedure in this guide here.
If you face any difficulties in migrating your emails, feel free to reach out to us at support@mailfence.com.
How to Migrate your Calendar from Skiff to Mailfence
If you were using Skiff Calendar, you might not want to lose your history of events. So the best thing to do is to migrate your Calendar to Mailfence.
To do this, follow these simple steps:
- Log into your Skiff account.
- Navigate to General > Export.
- Next to Calendar, select “Export”.
This will download your entire calendar in *.ICS format.
Next, import your calendar into your Mailfence account:
- Navigate to your Calendar > More.
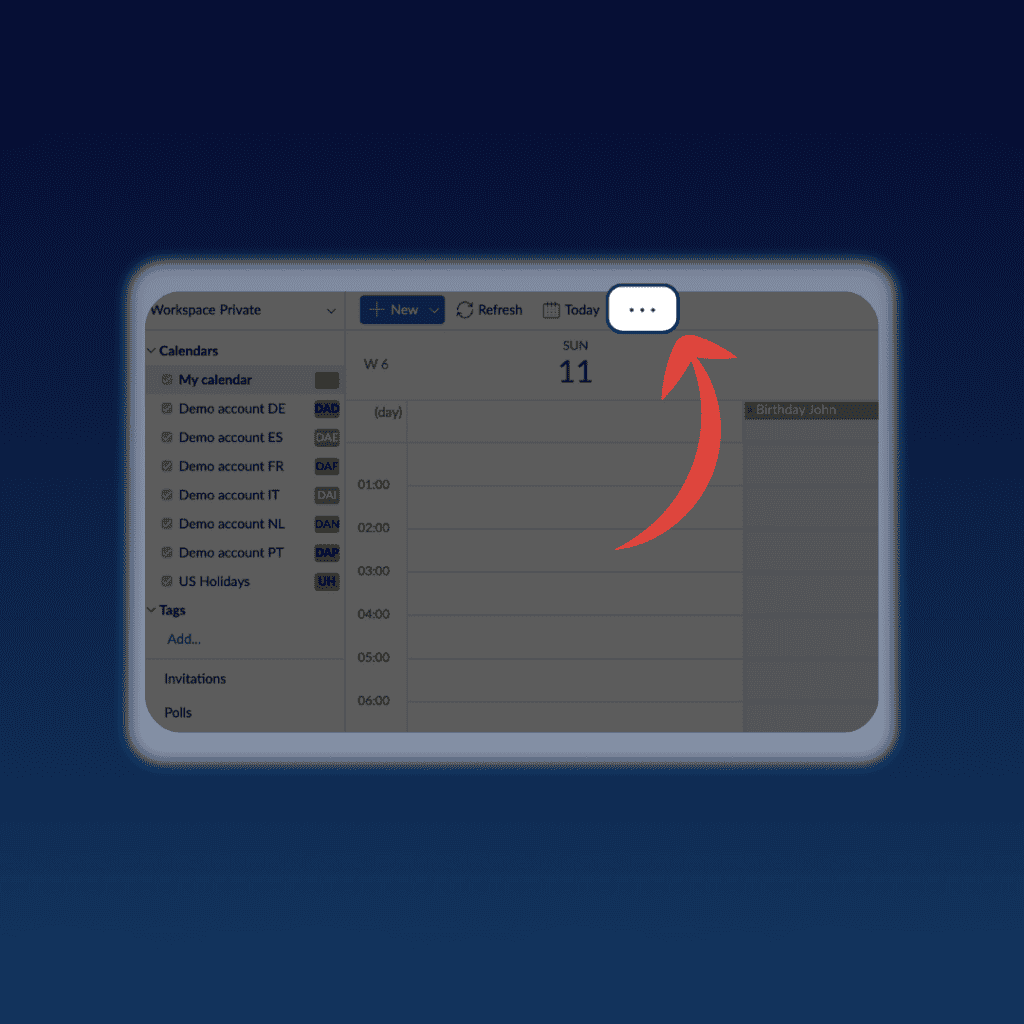
- Select Import > Import from File.
- Select your *.ICS file and import.
Your full calendar is now migrated from your Skiff account to your Mailfence account!
How to Migrate your Storage from Skiff to Mailfence
Were you using Skiff Drive? Then you need to make sure to back up all of your files and documents.
Luckily, you can easily migrate all of your Skiff Drive to Mailfence Documents.
No complicated procedure here. Simply download all of your documents from your Skiff Drive. Then, drag and drop them into your Mailfence Documents account.
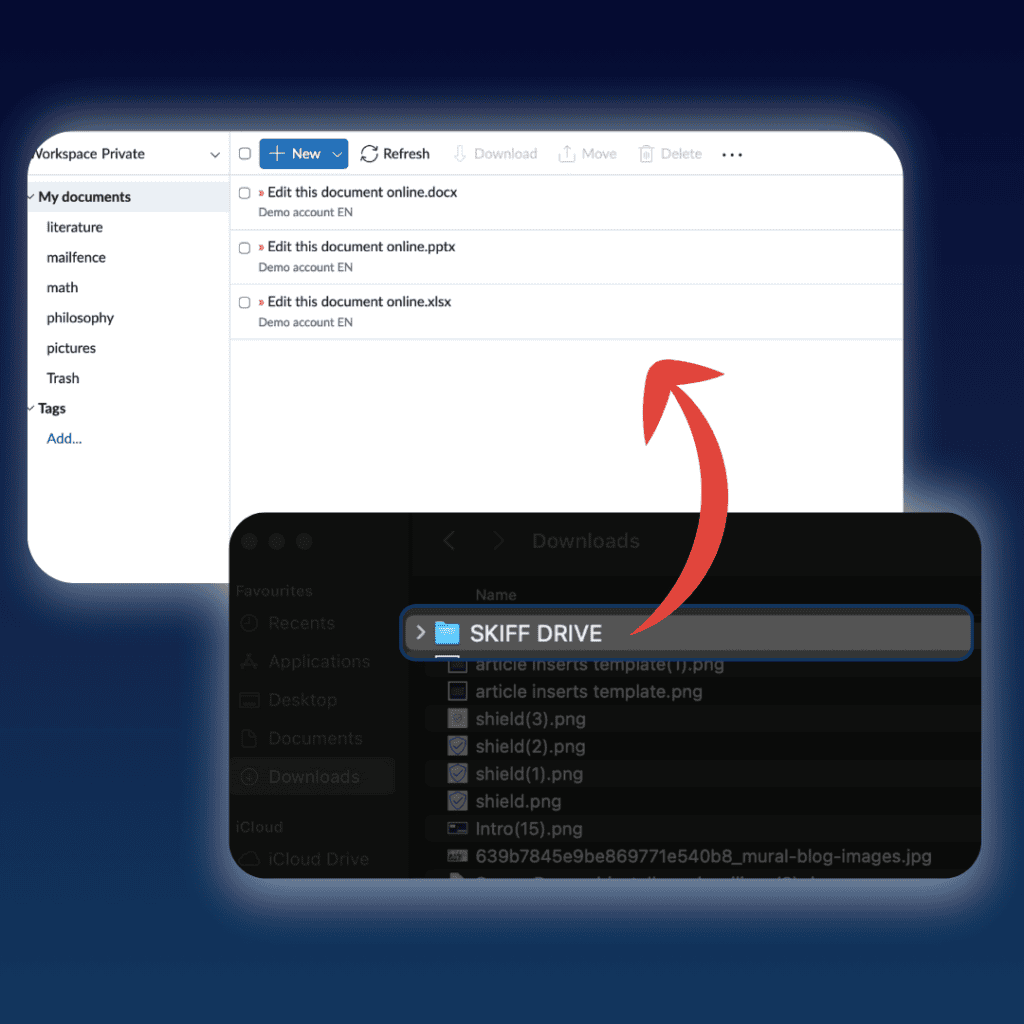
Alternatively, you can use the WebDAV protocol which Mailfence supports. Learn more about migrating your documents with WebDAV here.
How to Migrate Your Contacts
Finally, you may also want to migrate your list of contacts from Skiff. The procedure here is similar to exporting your Calendar:
- Log into your Skiff account.
- Navigate to General > Export.
- Next to Contacts, select “Export”.
This will export your list of Contacts in VCF format, inside a ZIP folder.
Next, log in to your Mailfence account:
- Firstly, extract all the VCF files from the ZIP folder.
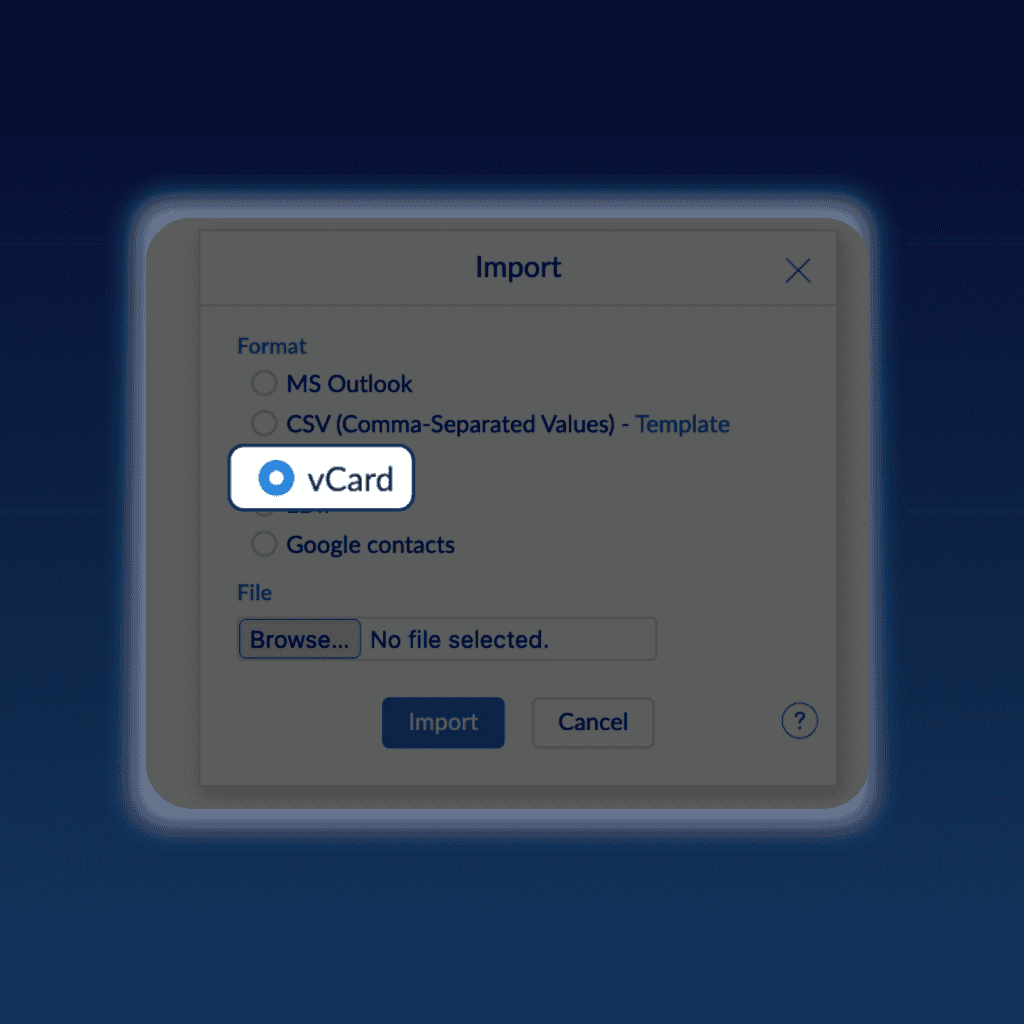
- In your account, under Contacts, select “More“.
- Click “Import“, and select “vCard“.
- Choose the files you extracted from the ZIP file from Skiff.
Last Words
Hopefully, you now have a better idea of life after Skiff. This fiasco highlights the importance of choosing your email provider carefully.
Here at Mailfence, we are committed to:
- No tracking, no advertising. We do not use any third-party advertising or marketing trackers. We do not track your activity in the application. Mailfence is completely free from ads. We do not send spam or solicitations. We will never commercialize our databases or share data with any third party for targeted advertising or any other purpose.
- Strict privacy laws. In many countries, government-sponsored programs collect massive amounts of data from the Internet. This data collection is done without any search warrant, court order, or subpoena. Mailfence’s servers are based in Belgium, with strong laws protecting privacy. Only a valid Belgian court order can force us to release data. Since we have no foreign parent company, we never comply with any rogue or other data requests from either domestic or foreign authorities. We are not liable to US gag orders or NSLs.
- No VC money. Mailfence is 100% self-funded and lives through the subscriptions of our users. No venture capital, no pressure on fast returns. An established company with a spotless 20-year track record.
Want to get started? Create your free Mailfence account today.
